Translate

Friday, November 30, 2012

Just a quick little note to about giveaways.  If you haven't noticed, I have a giveaway page (check the top tabs).  Here you will find all the giveaways I have entered and have the opportunity to enter them yourself!  I update this each time I find a new giveaway or one expires.  I think I will just notify in posts if I have entered a new one.  I love entering giveaways, even though I haven't won any yet.  Try it out!  Who knows, you just might get lucky!
See you soon!

Final Fall Mani


I had a root canal done today, so forgive me if I ramble or misspell anything.  This is the last fall manicure!  I may have more to post, but none to polish :)  I am so ready to do something else, just like I was ready to be done with the Halloween manis.  This may have been one of my favorites though.  Here's how I did it.


I started with a base coat and one coat of OPI Schnapps Out Of It.  Yes, I said one coat!  I could have added another, just for good measure, but since it had full opacity in one coat and I am not a patient grl, I figured why mess with a good thing.  I love this color!  It was the only one out of the OPI's Germay collection that I decided that I just MUST have.  There are others I want, but this is the only one I own (so far :).  I would describe this color as a terra cotta/toffee orange with a very slight shimmer.  The color is a bit darker than in my photos (I hate that!)  If you want to see a more accurate representation of the color (or the whole Germany collection) check out PolishAholic's post HERE.

I wanted a background for the leaves to sit on so they wouldn't be too stark, so I tried sponging with a bronze glitter, but didn't like it.  I have done a lot of glitter recently so decided to try a subtle stamp under the leaves.  I stamped with Orly Buried Alive and Bundle Monster BM-316, the delicate contoured leaf design.

Finally, I stamped with Essie Good as Gold (my fav gold stamping polish) and BM04.


After a final top coat I ended up with this.


What do you think?  I am regretting having to remove this, but I have signed up for a 12 Days of Christmas Nail Art Challenge (found HERE) so it will be all about Christmas/Winter in the coming weeks.  This is my first challenge, so be kind to my attempts :)

Thursday, November 29, 2012

She Wear Jean on Her Nails


I have seen some blue jean nails floating around the web like HERE and HERE, so I wanted to try my own, on Bria of course.  They aren't perfect, but I love them.  These close up photos show every little detail and, being the perfectionist that I am, I am not completely happy with them, but on her nails they looked soooo cute.  Here's how I did them.


I started with Avon Suede Enamel in Blue Royale.  I love Avon's Suede Enamel.  This is the best matte polish I have tried so far.  Want more of this matte?  Check it out HERE.  Watch for it.  Painting Bria's nubbies is difficult, so forgive the mess, I just hate cleaning up after every single step.


Next I used a saran wrap technique with Maybelline Color Show Denim in Denim Dash (how appropriate :).  The technique I used was to dip saran wrap "balls" into the polish and dot onto the nails.  Kinda like a a sponge technique, only with saran wrap.  This color was another suede polish.  I was going for a matte look, just like jeans.  I mean, there are shiny jeans out there, but no one in my family wears them!


Next I added "seams" with lines of Avon Blue Royale, "stitches" with China Glaze Kalahari Kiss and "rivets" with Revlon Copper Penny.  If I were to do this again, I would use acrylics for the stitching as I find I have better control with acrylics and maybe I would have made straighter lines.  I definitely like Kalahari Kiss for the color since none of my jeans have white stitching. 

So, although I loved these, all I can see right now is the flaws, but Bria said everyone at school loved them too and that's all that matters.

What do you think?  See you next time!

Tuesday, November 27, 2012

The Birds Want My Candy Corn


This hot mess was one of my Halloween manis.  I wanted to do candy corn nails, but the idea had been so over done.  I wanted something different and from that this was created.  The idea was scattered candy corn seen from above, hence the title :)  I got a lot of compliments on this, but truth be told, I didn't like it.  I think maybe it was the stark white base.  Ever since this mani I have been looking for a cream white, not too grey, not too yellow, not too tan, not so stark.  Haven't found it yet.  Anyway, I just didn't like it.  Lasted two days and then...buh bye!  No inspiration this time, just my crazy idea.  Here's how I did it.
  • Base coat (do I really have to say this every time?)
  • Sally Hanson Instra dry in white.  I had this as a back up for stamping, which it does well, but as a base it sucked!  Thick, gloopy and insta dry it was not.  Because of the consistancy it was hard to get thin coats.  The surface dried fast but was prone to dings, dents and fingerprints from when I kept trying to see if they were ready to stamp :(
  • Stamped with Bundle Monster BM-213 and Konad Special Black.
  • Painted "swirlies" with Sinful Colors Cloud 9
  • Dotted with Sally Hanson Lightening
  • Top coat
I liked the idea of this, just not the colors.  I may just try this again...maybe with some lime green and purple.  We'll see.

Monday, November 26, 2012

Snake Skin Love


This was one of my first Manis, so please forgive the messy cuticles, poor picture quality, tip wear and bubble on my ring finger.  This picture was taken after several days of wear.  I was inspired by The Nailasaurus Here.

As soon as I got China Glaze Agro, I knew I was going to do a snake skin mani with it.  I LOVE Agro!  It is a gorgeous mossy metallic green.  It is also great for stamping with.  Hopefully I will use it as a base for a step by step post soon so you can see it in all it's gloriousness.  Here is how I did it:
  •  Base coat
  • Two coats of China Glaze Agro
  • Stamped Bundle Monster BM215 with an unnamed dark green ELF polish I found at target.  I searched all over the bottle for a name but couldn't find a thing.  I hate that!
  • Stamped again BM215 with Sally Hansen Forbidden Fudge
  • Top coat
Here's a close up of my thumb

Not the best Picture and I hate the polish wear, but I LOVED this mani hard!  I wore it for five whole days.  What do you think?

Sunday, November 25, 2012

Black Friday Mani

Sooo...I had this idea for a Black Friday manicure...had it all planned out...took my polish off late Wednesday night...applied a couple of coats of base and figured it was to late to complete without sheet marks.  "I'll finish it tomorrow while the turkey is cooking".  This is what I ended up with on Friday

Nekkid nails.  Not too terribly stained.  And yes, you can see my "smoky mountain" nail ridge there on my middle finger.  Any body else got one of those?
 
Between getting Thanksgiving dinner ready, eating and getting ready for Black Friday shopping there wasn't a free hour, which is what I needed to complete these nails without scuffs and dings.  I take that back...there was a free hour, but I choose to take a nap instead so I would be rested up for shopping.  After all, I did have to be at work at 9:00 on Friday morn, so I needed a little rest.  Go figure.  Anyways, my nails survived the meal making, house cleaning and 6 hours of intense shopping (although a good 2 hours of that was just standing in line) without the added strength of 3 or 4 more coats of polish.  I even went to work with these bad boys!  It has been a couple of months since the coworkers have seen these.

I thought I might show you what I had in mind originally.  This wasn't the complete idea.  There was some stamping involved in my head, but since I just did this to show you (my one beloved follower) before the next mani goes on, I didn't want to spend too much time on it :)

I started with one coat of Sinful Colors Black on Black with a funky french tip in one of my first indie polishes, Different Dimension Black & Gold.  I am so happy that my first indie was from Different Dimension.  You can find the store HERELet me show you some bottle shots first.


Different Dimension Black & Gold
 Look at that gorgeous gold halo glitter suspended in a black jelly.  This is from the Team Spirit collection.  Pictures cannot capture how fascinating this polish is!  Although I layered this over black, it can be worn on it's own.  I could spend a lot of time just staring at this on my nails, moving them around, watching the gold and halo flashes.  Right now she has her Santa Baby collection out and I am hankering for a few of them.  I will have more Different Dimension Polishes coming up soon, including some on Bria's nails, so watch for them!

Here is what it turned out like.
 

Yeah, it's a little sloppy with no top coat, but it will be gone tomorrow and I won't be seeing anyone but the kids and husband today, so I just don't care!  Actually, I'm glad I didn't put a top coat on my nails as you can see how shiny the Black & Gold is, even without a top coat. 

One last shot so you can get an idea of the wonderful flashes I keep looking at.  See it there on my ring finger.  Mmmm love it!


Hope everyone had a great Thanksgiving!  See you soon.

Tuesday, November 20, 2012

Bria's Turkey Tails

Why is it so much harder to photo someone elses hand?

Just a quick post before the Thanksgiving rush.  Bria is my dear 17 year old daughter.  She is cognitively disabled and mentally is at an 8 year old level.  She LOVES getting her nails done and I LOVE doing her nails because I get to do things that I would never wear to the office.  I do her nails once...sometimes twice...a week.  When I asked her what she wanted this week she said, "It's Thanksgiving.  Can we do turkeys?".  Now, I am certainly no artist so I looked through my Pinterest boards and found this here.  I'm not going to post the picture because it puts my picture to shame, but go check it out!  So I said "how bout some turkey tails?".  I don't have step by step pics this time (I was in a hurry and a little nervous about how it would turn out).  Here is what I used.

  • Base coat (of course)
  • Butter All Hail the Queen.  Love this polish!  This is just ONE coat and complements Bria's skin so nicely.  Almost want to redo, just so I can photo this alone on her nails :)
  • Stamped with Konad Special Black and Bundle Monster plate BM210.  I only used half of this stamp to get the turkey tails (tee hee)
  • Layered the "feathers" with Orly Buried Alive, Spoiled Cougar Attack and Loreal Because You're Worth It.
  • Top Coat (of course).
What do you think?  These are totally work appropriate.  Look like turkey tails?  You'll see Bria's nails popping up again.


Saturday, November 17, 2012

Gradient Fall Nails


Another fall nail and another gradient.  Last one was done "free hand" sponging.  This one was more "structured" sponging.  This was inspired by More Nail Polish here.  Read on for details.

I started with a base coat and two coats of Loreal Because You're Worth It.  I love this color of Gold.  It has a bronzish cast to it rather than yellow.  It is definitely a two or three coater, however, and you have to watch the brush strokes.  Sponging over it completely covers the brush strokes.  Yeah, I know, these tips look awful.  I had the brilliant idea to wrap the tips with the darkest color before I started sponging.    Bad idea.  It just made a big sloppy ridge that would show, even under the gradient, so I filed it down.  This is what it looked like when I was done.  Didn't care....knew I was going to be covering it all over anyways.  Another lesson learned!


Next I striped a makeup sponge with (from left to right) Orly Buried Alive, Milani Buou Bronze and Loreal Because You're Worth It.  I then sponged it on my nails.  There are a lot of different ways to achieve gradient nails.  Just google "gradient nails tutorial" to find out all the different ways.  I am in the process of trying different ones to find which one works best for me.  I like the results of this better than free hand sponging.  Gives a more blended gradient.  Learned a lot of lessons during the process that I will pass on.

 This is what it looked like after the first sponged layer.  Very light coloring.  Notice that I was smart enough to tape around my nails for easier clean up.  You can see that there are some gapsThis was my first time doing this and I expect to get better with practice.  Through trial and error I found that it was best to do several light sponging layers with light coats on the spongeToo much polish on the sponge and it just made a big mess.  I also found that I had to let each layer completely dry between coats or the new coat would just pull the first off and not build up.  Didn't take long to dry because the layers were so light.  Here's what it looked like after three layers.

 I sponged along the nail tip to get the wrap on the nails that I was trying to achieve at first.  Next I layered on a top coat to get a smooth surface to stamp on.  Finally I stamped with China Glaze Agro (my favorite green for stamping right now) with Mash stamping plate 18, the fern pattern.  Here is a photo without flash so you can see the stamping a little clearer.

 
Another lesson I learned....don't do a manicure with a scarf on:)  The darker line on the thumb is a scarf fuzzy that liked to collect the Orly polish.  

Hope you like it!


Wednesday, November 14, 2012

My Current Mani


This is the mani I am wearing as I type.  I am on a fall nails kick right now.  Probably will be until December.  The effect I was going for was fall leaves fallen on the ground.  If I did this again I would do the glitters at the tips instead of the cuticles because, well, the tips are "ground" directionally to me.  This would be cute, though, with some tree trunks growing up from the tips :)

I started with Nina Beige A Vue
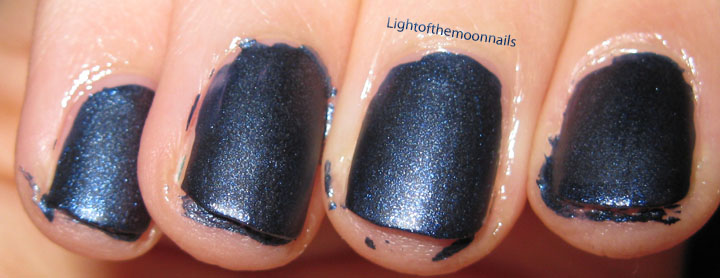
See that horrible gouge.  Yeah, that is a big ol lump of polish to the left of the gouge.  I'll show you how I fixed it shortly.  The color in this picture is not accurate.  See the photo above for better color match.

Then I sponged from the cuticle 3/4 the way towards the tip with China Glaze Swanky Silk
Next I sponged the lower 1/3 with China Glaze Winter Holly
If I was smart I would have taped around my cuticles for this step.  This glitter was a ***** to clean up (as you can see in the first picture).  I love Winter Holly.  It is so densely packed with dark green glitter, but that made it difficult to create a decent gradient.

Next I sponged on Orly So Go-Diva, an awesome copper flaky.  The Orly covered most of the green glitter, but I knew with the denseness of Winter Holly, if I sponged on more, it would just cover up the copper "leaves".  (Think there's enough commas in that sentence?)  So instead I sponged on some Spoiled Show Me the Money.  The glitter in this polish is very sparse and a brighter green so created the gradient look I was trying to achieve.


So, want to know what I did with that gorgeous gouge?  First I let it dry completely then buffed it with my nail file.  Then I applied another coat of Beige A Vue.  See the pictures to see how it turned out.
What do you think?  If you look very closely in the final mani you can see a very small divot, but considering how horrible it was in the first place I think it worked out pretty well without having to remove it all and start over again.  See you next time!

Tuesday, November 13, 2012

Really? ANOTHER Nail Blog?

Yes, another.  After haunting the blogs for several months, I have decided to jump in.  Mostly for myself, to document, but hopefully to inspire like I have been inspired.  I have only been obsessed for 3 months (can that possibly be?) but in that time I have learned a lot and bought A LOT.  One of these days I will post about my guilty nail confessions and I will tell you how many.  Long story short, I bought my first Konad kit at the Minnesota State Fair at the end of August with only 2 nail polishes in my entire house.  I quickly added more!  Every weekend I did my nails and my daughter"s nails.  The girls at work started asking me to bring in pics of my daughters nails every week.  I started documenting my own too so I wouldn't forget what I had done.  Soon I was changing my nails two or three times a week, so I have several pics to share over the the next few weeks.  Hopefully I will get caught up soon.  Forgive some of the pics, I started out with my iphone.  Bear with me as I learn the ropes.  Enough about me...on to the important things!


Don't know why I choose this as my first post.  Guess it is the combination of originality (in all my blog hopping I have not seen this stamp used) and good photographyI don't get to photograph in the sun much since I always do my nails at night - hence the name - and I usually change them too quickly :)  Please forgive the tip wear and cuticle flooding.  I was still perfecting my polishing techniques at this point. 


  • The base color for this is Sinful Colors - Cloud Nine (Orange) 
  • Stamped with Konad - Special Black (this is a ***** to clean up, but the best stamping black) and Bundle Monster plate 217 (or Mash 06).  This is a french tip stamp, but I used it for a half moon.  This left quite a bit of the orange showing through around the edges so I used a small paint brush to touch up the areas I wanted with black acrylic paint (a lot easier to manipulate in small places than polish). 
  • Finally I painted from the end of the stamp to the tips with Fantasy Makers - Nail in the Coffin, which has a very subtle halo glitter in it.

This was one of my Halloween themed mani's.  I'm sure those are supposed to be flowers, but they look like amoebas or alien eyes to me - hence Halloween.  Hope you like!