Guess what? I have my first guest post today at Of Life and Lacquer! Check what I used to make this edgy mani at Cynthia's blog HERE.
Oh, by the way, my giveaway is over and the winners have been notified! They have 48 hours to reply, and then I will draw if no reply. Thanks to all my long time followers and welcome to all the new ones!
So sick....cough....please go vote....wheeze.....for my nail art.....sneeze.....HERE....
sigh....will post about it.....hack.....later.
Let it Snow NAC theme today is Winter Ombre/Gradient. I decided on a gradient, as I am not wild about ombres. Bria's nails got the mani this week!
I started with two coats of Essie A Crewed Interest. This is a lovely creamy pink that kept washing out, I think because of the glitter. It looks like a nude on Bria's pale and pinkish fingers, but on me it looks like a lovely pale, coral leaning pink.
I have had this polish on my wish list for a long time, and guess where I found it? Walgreens! I stopped at a Walgreens I don't normally patronize and found a bin full of clearanced cosmetics, including several polishes. I was like a dog looking for a bone digging through it all. Then I found an end cap with more polish, and there it was, this lovely pink for only $4!
While I was there, I also picked up Wet n Wild Frosted Over.
I have to admit it, I purchased this because of the bottle. Don't judge me! They had a bunch of these standing up in a display like suckers. Are they trying to say something about polish buyers? I really like this polish, except for two reasons. First is what I found when I opened the bottle.
This is the wonkiest brush I have ever seen! Just took a few snips with my nails scissors to fix though. The next reason I have a love hate relationship with this polish is that it is IMPOSSIBLE to capture in pics. The glitter shows, but it is also filled with a duochrome shimmer with a teal/pink/purple shift. You can kind of see it in the bottom bottle shot above, and a little bit of the teal on the out of focus nails in this shot, especially the index finger.
and a bit of the pink on the edge of the middle finger in this pic....
But I could never capture the purple in any of the many pics I took (thanks for your patience Bria!) See all that "muddy yellow" looking shimmer? IRL that all is that duochrome shimmer, shifting from teal to pink to purple. Oh well, you know where to go to see it in real life, anywhere that sells Wet n Wild. One last pic that shows more of the teal on the pinky. I really took TONS of photos trying to capture this, so be glad that this is the last (tee hee).
Now you can see the rest of the manis
Challenge 12 of the Let It Snow NAC is winter wonderland. I loved how this turned out!
I started with two coats of Dandy Nails Chilled Down.
I love this polish! A white base with brown and blue flakies...Winter personified! Dandy does it again. You can find this and other wonderful polish at her Etsy shop HERE or at Ninja Polish HERE.
Next I sponged the tips with Contrary Polish Hayride, another glorious indie. I love to be contrary (tee hee). Want to see it on it's own? Check a previous post HERE.


 Next I stamped with LeLac XL plate B and Avon Forbidden Fudge and filled in the branches with "snow" made with OPI My Vampire is Buff, my new favorite "white".
This just screams winter to me. I love it all, even the way a little bit of the branch stamped on my index finger. A final look, then check the other winter manis.
Next I stamped with LeLac XL plate B and Avon Forbidden Fudge and filled in the branches with "snow" made with OPI My Vampire is Buff, my new favorite "white".
This just screams winter to me. I love it all, even the way a little bit of the branch stamped on my index finger. A final look, then check the other winter manis.
Once again, I am a day behind in the February Love-ly NAC. The theme for this was gifts. I have two manis for this, so please forgive me.
This first one probably doesn't make any sense. Look, and then I will explain.
This was inspired by Chalkboard Nails HERE.
Now the reason these are considered "gifts" is that one of Bria's teachers loves owls. So I did these on Bria's nails as a "gift" for her teacher.
I started with Sinful Colors Cinderella as a base.
The Owls were made with China Glaze Your Touch (body), Zoya Cheryl (wings and legs) and Sally Hansen Insta-Dri Lightening (eyes and beak).
The hearts were made with China Glaze Your Touch and Nina Spun Sugar.
Bria said that the big owl was scratching his butt, because I messed up his wing (tee hee).
The next mani was inspired by the gift box my valentine chocolates came in this year.
I started with Sally Hansen Insta-Dri Rapid red.
This color isn't really me. It is too bright a red. I like those vampy reds. One of the benefits of the Insta-Dri is that it really does dry really, really, really quick. I can paint my nails five minutes before I walk out the door with no topcoat and not worry about ruining my nails. This red, though, is terrible with the staining. Nails, cuticles, everything, so make sure you wear a base coat or two.
Then I stamped with Sinful Colors Black and LeLac XL plate B. Love this plate! I wanted to use Konad Special Black for this stamping, but I think my bottle is getting too old and the stamp to detailed, because I couldn't get the image to transfer, the polish kept drying too fast.
A little late for week 11 of the Let It Snow Challenge....Valentines Day. But I am finally getting caught up.
My inspiration was a card my Hubby gave me for Valentines Day last year. Here's the card.
And here's the mani.
Didn't quite turn out how I wanted, but that seems to be par for the course lately.
I started with two coats of Orly Shock Wave. Wasn't thinking when I painted all my nails (tee hee) Next I used the cut out tape method to add Revlon Moon Candy Moon Dust and SOPI Shattered Opalescence in a heart shape. I pained around the heart with black and used my striping brush and different sizes of straws to add a silver stripe and circles.
Yep, that ring finger is sorta a mess. I wish I would have free handed the circles around the heart and not added circles to the index and middle finger. Once again, oh well. Finally, I matted it all. The only finger I really liked was was my thumb.
I promise, the next mani is going to be sooo much better. Look for it soon. And check out all the other beautiful Valentines Day Manis.
Ever visited Of Life and Lacquer? If not, you should. She has more giveaways than anyone I have ever seen. She is having one now. Plus, she asked me to be a guest on her blog, so watch for that soon!
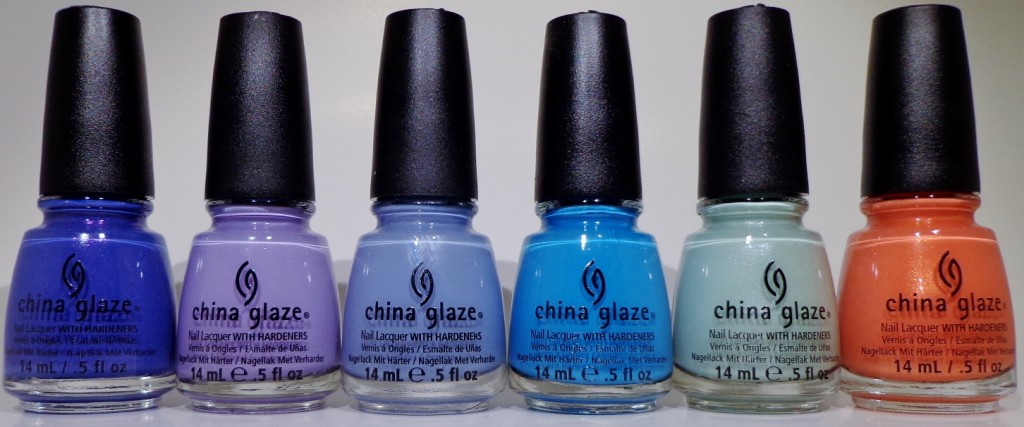
Look at all that China Glaze! Go check out her blog HERE for her giveaway.
The theme for yesterday, which I am posting today, was/is broken hearts. I had great plans for this mani. I'm beginning to think that I need to stop planning, because this is my least favorite mani I have done....ever. But I decided to post it anyways, failure or no. Everyone loves a fail, right? Makes us all feel a little better about our own.
The idea was using a "shatter" polish to make shattered hearts. For some reason the shatter polish wouldn't shatter. Maybe I didn't get it thick enough....or too thick....who knows. This same polish has shattered perfectly in the past. Oh well.
I started with Maybeline Downtown Brown. Want to see it on it's own? Check my previous post HERE. It is one of my favorite browns, creamy with a teal shimmer.
Next I cut hearts out of tape, added to my nails and painted over with China Glaze Oxidized Aqua. No shatter...or very little. I painted my ring finger with the same, with more shatter, then added another heart (freehand this time) with Downtown Brown. That's it. Me no likey. Oh well, we all have fails. Go check the others.
I am trying desperately to get caught up on some posts...so this is going to be a quick one. My Hot Chocolate Mani for the NCC Let it Snow Challenge.
What do you think? Look like Hot Chocolate....Sorta?
This started with two coats of Orly Chocoholic (appropriately). Next I added one coat of Different Dimension Selene, a white multi-glitter that I hoped would look like marshmallows. Looked more like snow, which I loved, but didn't fit for this particular challenge, sooo....
I tried just adding another layer of Chocoholic on top, hoping that it was translucent enough to let the glitter show through. Didn't work. So I tried sponging a coat on. Still not feeling it. Maybe a topcoat would help?
Although I liked this, still not getting the warm mug of chocolaty goodness feeling yet. So why not add some matte.
Bingo! Or as close as I was going to get. That was a whole lot of photos for such a "simple" mani, but I thought you might be interested in the process of how my brain (sometimes) works (tee hee!)This reminds me of when I used to add two packets of the mini marshmallow cocoa to my cup and got that really dark, thick chocolate that I loved as a child. Yum yum! Want to see some more mouth watering manis? Check these out!
I have so much to blog about today, so watch for several posts. My first is going to be for the February Love-ly NAC. Supposed to post a couple of days ago, but I am soooo behind in all my challenge/groups. February 14 was Valentine Gradient. Here is what I came up with.
I really liked this, for several reasons. For one, it is made with ALL indie polish. Secondly, it started with my all time favorite polish. Yes, I have one! It is my favorite color, cobalt blue, with my favorite finish, jelly with a micro glitter, in this case, a pink copper.
This is the amazing Girly Bits CU Blue. For those who don't remember high school chemistry, CU is the symbol for copper on the periodic table of elements. How perfect is the name of this polish? Almost as perfect as the polish itself!
It reminds me so much of Lapis Lazuli, a gorgeous blue stone, although it usually has gold flecks instead of copper. What do you think?
Being a jelly, this took 3 thin coats for (semi) opacity opacity. If I wasn't going to gradient/stamp on it, I would have added another coat. Of course, the more coats, the more depth, so I can't really complain. Luckily, this did not take as long to dry as other jellies I have tried, so my patience wasn't too tried. The only complaint I had was that the glitter in this made cleaning my cuticles a bitch! Glitter everywhere the polish touched, so be careful around the edges with this one. This, my most awesome polish, and other Girly Bits polish can be found in a couple places
Girly Bits Bigcartel store
Lllarowe
Harlow & Co
Overall Beauty
Mei Mei's Signatures
A few of her pretties can be found on Etsy
The next reason that I loved this was the glitter gradient and subtle stamping. Those of you who follow my blog know that I love a subtle stamping mani. Can you see the stamp in the pic above? Let me give you a hint. I stamped with BM-301on my ring finger and thumb.
The gradient and stamping was done with GlitterDaze Sundown in Seattle. I would try to describe this polish, but Sana from GlitterDaze does it better:
"Sundown in Seattle is a holographic multichrome polish, which shifts from orange/copper/yellow/red. This polish is based on the sunsets of Seattle, Washington and has the perfect shades to portray a beautiful evening sky overlooking Lake Washington."
I ordered this some time ago on Etsy, and I have to say that I love it! Plus, Sana does a great job of packaging and nothing warms my heart like good packaging.
I purchased two colors from her Sunset in the City collection, but unfortunately, Bria knocked one off my polish table and broke it. That's when I surrounded my table with throw rugs! Anyway, you can find GlitterDaze HERE. Go check out all the lovelies.
 The little heart gleequins were next. They look white, but they are actually a very light pink (which you can see in the pic below) with an iridescent finish, which the camera would only catch in the photo above, and then not very well. I found this in a set at my local dollar store. Nuthin like a great deal on hearts to get my heart pumpin! And in this pic, you can see the stamping a bit better. One last pic.
Now you can see all the other lovely gradients.
The little heart gleequins were next. They look white, but they are actually a very light pink (which you can see in the pic below) with an iridescent finish, which the camera would only catch in the photo above, and then not very well. I found this in a set at my local dollar store. Nuthin like a great deal on hearts to get my heart pumpin! And in this pic, you can see the stamping a bit better. One last pic.
Now you can see all the other lovely gradients.


