I had no plans for posting today, but Mom got sick so Christmas dinner was called off and I found myself with some extra time. Not to worry, we spent Christmas Eve with the whole family, as usual, with our fondue tradition. When I was younger, we would sit on the floor in front of the fireplace and fondue, broth, oil and chocolate for dessert. Since then, it doesn't matter where we are, together or not, we always have fondue on Christmas Eve to bring us closer to each other. My sister-in-law's family joins us, now that they are in the same state, so there were 12 of us around the table last night. Even exchanged gifts, so missing Christmas dinner is a bummer, but not all bad. It gives me a chance to share my official Christmas mani!
I did this Monday night so it would be ready for Christmas Eve. It took me a couple hours with breaks, but I think it was totally worth it!
I started with two coats of Maybelline Emerald Elegance from their Gilded in Gold Brocade collection. If you want to see it on it's own, you can check it HERE, along with my thoughts on formula etc. And just like I said in my original post, it did show up in December....and on the big day too!
Next I stamped with Konad M77 and Maybelline Bold Gold (guess it was a Maybelline Mani :) I thought about leaving it there, but it seemed a little plain to me, so I dotted one of the strands with Sally Hansen Radio Red. Still not enough for me. I really wanted to make it look like strands of beads wrapped around a Christmas tree, so I added some red micro beads on top of the red dots.
After adding the red beads, the gold dots looked a little lacking, so I added more micro beads in gold. Then I wanted the "jewel" hanging to look more like an ornament, so I added some silver star sequins I had from a holiday nail wheel I bought after Christmas last year at a huge discount. Still not blingy enough? Well the silver didn't quite match up with everything else, so I found some little itty bitty yellow star jewels hiding out in another nail wheel. Whew! Finally met my exacting standards for a Christmas mani.

I swear I was ready to pull my hair out on those last few fingers with the micro beads. They came in a little pot of both red and gold all in one that I purchased from MAU sometime last year. Separating the colors was almost as much trouble as applying them. All the bling was added with dots of top coat. Problem was that I didn't want to use a fast drying top coat so I could have time to place the beads where I wanted them, but my only slow set top coat has thickened up and was pulling strands like a spun sugar mani. Total PITA! Totally worth it! I topped it all off with two coats of top coat because Emerald Elegance is top coat hungry and to make sure everything stayed in its proper place. It did! I only lost one star the second day of wear.

I had to work a half day Christmas Eve, and these babies kept me smiling through it all. This was totally out there for me as far as what I usually wear, but it is Christmas, right? If you can't have totally blinged out nails on Christmas, when can you? These are definitely coming off tonight, though, as the edges of the little stars keep catching on things, my hair, my sweater, even gouging a little cut on one of my photo fingers :( Still totally worth it!
I am going to be taking a little blogging break the next few days so I may not post until the new year. I have some more changes to the blog coming, plus I have to find time to narrow down my wish list to see what is going to be blessed with my Christmas cash! Wish me luck!
Tina
So much to do, so little time! I am taking time, however, to show you my last mani for the 12 Days of Christmas challenge. I did this as a Christmas present for my sister-in-law. She is very hard on her hands, so I wanted to pamper her. She was so happy with the outcome and I was happy that she was happy. Plus I liked it too!
S-I-L wanted her nails so that she could admire them, therefore the orientation is different than I normally do.
I started with two coats of LVX Celeste, a beautiful pale blue creme. I have said it before and I will say it again, LVX knows how to produce an excellent creme. I sponged the base with Konad Special White. Big mistake! When we were at the State Fair the Konad Rep did a sponged gradient with their stamping polishes on Bria and I had left my white polish on my mani desk, so I figured why not. This polish sponged well and dried quickly, but cleaning it up from the cuticles was a b***h! I normally would use straight acetone for stubborn polish, but S-I-L's skin was so dry, I didn't want to dry it out more.

 Next I stamped with BM-407 and China Glaze Strap on Your Moon Boots. Then I stamped the thumb with BM-014 and Strap On Your Moon Boots.
Finally I added one coat of Essie Carnival, a holographic glitter, and top coat. I love how Carnival makes it seem like it is snowing. So purdy! Check out the other freestyle Christmas designs.
Today's prompt for the 12 Days of Christmas is the big man himself, Santa, but I went with his better half, Mrs Claus. I did a similar mani last year and, if you are interested, you can find it HERE. While I was editing these photos, I kept thinking that something was not quite right...that I was missing something. See if you can figure out what it is.
For some reason, most of my pictures of the finished mani turned out fuzzy, so I don't have a whole lot of Mrs. Claus, but plenty of the gorgeous base I used.
This is three coats of OPI Pompeii Purple. This is not a color I would normally wear, and certainly not one that I would purchase, but it is being shared here thanks to a lovely co-worker. I happened to compliment her nail polish and a week later she handed me the bottle and said, "Here, you try it." Isn't she sweet? She is also one of the few that seeks me out every day to see what I have on my nails!
Since I was not familiar with this color, I of course had to do some research to find out more about it. I read that it was originally released in the 1999 Carnival Collection, but I also read that it was part of the 2004 Greek Isles Collection. Regardless of when it first was released, it now can be found in the 2013 Classic Colors Collection.
Although I wasn't crazy about how pale this makes my skin look, (I think it looks my fingers look older, of course the winter weather may be part of that) it really fascinated me. It looks like a fuchsia pink in the bottle....yet is called purple. But once I got it on my tips, it started to make sense. The base of this polish is actually what I would consider a light red, but it is filled with a purple shimmer, which makes it look like a bright pink. My theory is that Pompeii is the notorious volcano site, so it is a "lava red" filled with a purple shimmer, thus Pompeii Purple. Just a theory.
On top of this I created a belt using Finger Paints Black Expressionism and Loreal Because You're Worth It.. Finally I dotted the bottom with Wet & Wild French White Creme for a feminine lining.
So, Have you figured out what is missing? Yep, there is no trim down the nail where the coat would be buttoned up. Maybe Mrs. Claus buttons up the back....with a back baring scoop? At least in Santa's dreams! Thanks for looking and commenting!
If you follow me at all, you know that I love textured polish. So it should come as no surprise that my new favorite holiday polish is Zoya Chita, a perfect tone of green Pixie Dust polish. My mani today uses Chita and a couple of other green textured polishes in a gradient. Oh, and it is for the 12 Days of Christmas holly prompt.
I tried to take pics at each step, so this may be a bit pic heavy.
 |
| Artificial Light |
 |
| With Flash |
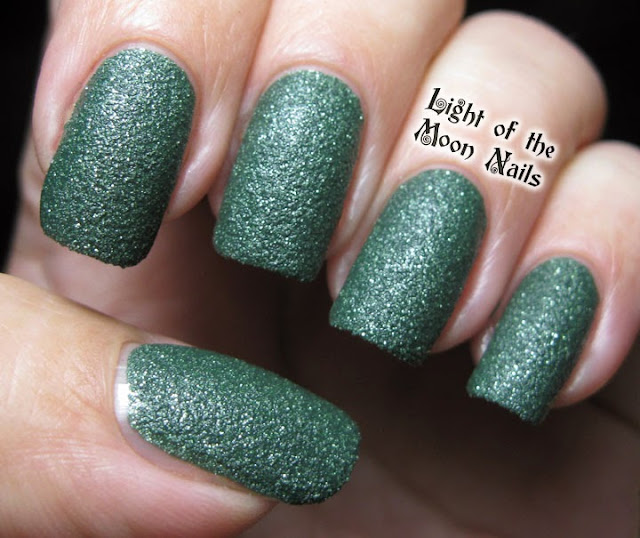
I started with two coats of Zoya Chita. It was totally opaque in one coat, but didn't give me the full texture effect I was looking for, so I added another. Although it was a little thicker than I am used to with the Zoya Pixie Dusts, it still applied easily. This is one of my favorite shades of green, a dark sprucy green that is slightly blue leaning. So beautiful on it's own, but I had other plans for it.
 |
| Artificial Light |
 |
| With Flash |
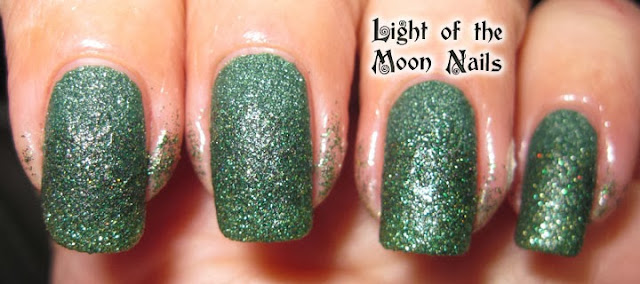
Next I created a gradient using China Glaze This is Treemendous (tips) and China Glaze Winter Holly (middle). Both of these are not "technically" textured, but they are the full coverage micro glitters that China Glaze that are textured. Winter Holly is a darker green that came out in last years holiday collection and This is Tremendous is a lighter green sprinkled with gold glitter from this years holiday collection. Yes, there is a mess, but I used masking fluid around my nails for easy clean up. Make this mess on bare skin at your own risk as those micro glitters are a pain to remove from any surface but nails.
 |
| Artificial Light |
 |
| With Flash |
Despite all the textured yumminess here, I decided to top coat it for a couple of reasons. First, I was going to be stamping on it . Second, the gradient showed a bit better with top coat.
Next I stamped with BM-014 and Maybelline Bold Gold.
Finally I added some dots of Zoya Rehka to the berries.
What do you think? Do you own any green textured polishes? Check all the other hollies.
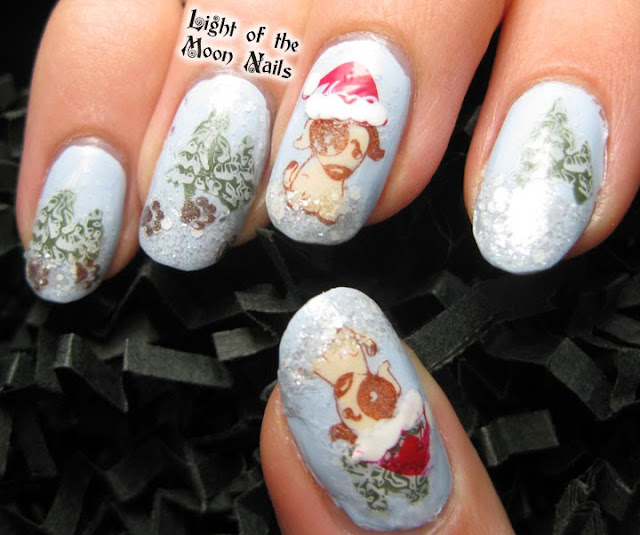
Only one challenge this month and I can't seem to keep up! Today is Friday's prompt, Christmas animals. I knew there would be a lot of raindeers, maybe some penguins. I, of course, wanted to be different. It was Bria's turn this time, so I gave her a choice. There were pandas, foxes, even dolphins, but she chose puppies. Oh, and I am using this for AIS too!
This started with a lovely pale blue, LVX Celeste. I have to say, LVX knows how to do cremes. Although the brush on this had bristles that were too stiff, causing streaking when applied, the formula caused it to self level and all the streaks disappeared. I still used two coats.


 I used the stamping decal technique with all but the doggy prints. For the trees, I used Konad Special White filled with Sinful Colors Man Hunt. The Dogs were Mentality Foxy filled with OPI My Vampire is Buff. Paw prints are Mentality Prim. Hats are Sally Hansen Insta-Dri Rapid Red dotted with W&W French White Creme.
Finally, I added some Different Dimension Selene on the tips as snow. Bria love this, so it was totally worth all the steps. Check the others!
A little late with this one. A quickie for the 12 Days of Christmas Ornament prompt.
I have had this done for over a week, but when I went to edit the pics, I realized that I had very few shots and all at the same angle. I don't know what I was thinking! I also didn't get any photos of this gorgeous base! So the plan was to re-swatch the base and maybe even stamp with a different color too. But then, once again....life. So I decided to just go ahead and show you what I have :)
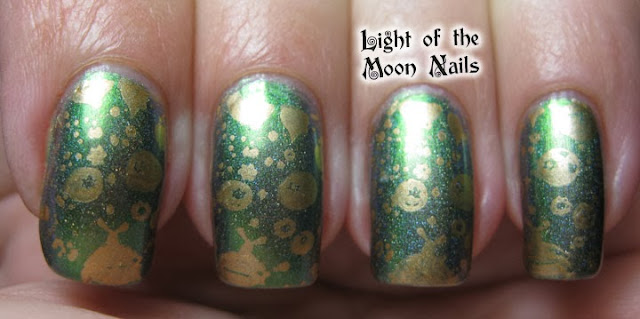
This pic shows you the gorgeousness of the base....a little bit.
The base is three coats of I Love Nail Polish Mutgen (H), a holofied multichrome that shifts from green to blue to red to orange. I hope to to have a gif of this on it's own soon.
Next I stamped with Sugar Bubbles SB Special 002 and Maybelline Bold Gold. Some of the pattern gets lost in all that holo goodness. If I was to do this again, I would stamp with a non metallic polish....maybe a royal purple? With the closeness of the holo sparkle and gold polish, you really couldn't see the details. The hubby thought it was a dotticure (although he didn't call it that :)
So there you have it. Not horrible, but I wish I hadn't done it at 2:00 am so I would have been a little more on it with pics. Check the rest.
I rarely post polish hauls, but what came in the mail last week was too good not to share.
This year's Black Friday shopping was tough for me. Why? Limited budget and too many nail polish sales. I had to be very picky. I limited myself to only two indies and one "non indie" brand. How did I choose? Well Zoya was having a great special where if you purchased $72 in product, you got the largest Dream Box for FREE! Since Zoya is my favorite brand, this was a no brainer. As far as the indies went, I chose to purchase only from indies I did not already own. I also purchased some of the Bundle Monster plates while they were on sale, plus a 10% off valued customer discount I had from my last order. So guess what showed up at my door, all in one day! Wanna see?

Epic nail mail! I seem to have missed one package in the pic, but don't worry, you will see it's contents soon. The of the bubble package on the left is some stamping plates that I had preordered some time ago from Vivid Lacquer. There was a special unexpected surprise in there too, an extra plate! I hope to get them on the blog next week. The bubble package on the right is the Bundle Monster plates. I purchased the 2010 Revised Collection, which has larger images of their first release. The first set from 2010 has miniscule full nail images. However, I have always had a soft spot for them because they were my first stamping collection purchase. Needless to say, when I heard they were re-releasing the collection with larger images, I was ecstatic! The box in the middle is one of the indies, Wonder Beauty. And of course, there is the HUGE box from Zoya! So ya want to see the polishes I got? Sure you do! First up, the indies.

Wonder Beauty, from left to right: Vortex, Funnel Cloud, Storm Chaser and Cranberry (my first thermal polish!)
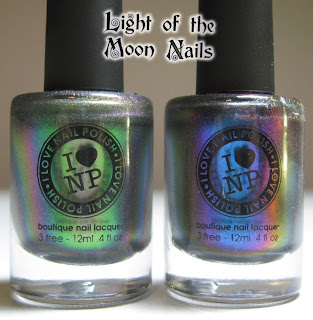

I Love Nail Polish Mutgen (H) and Birefringence (H). Look at that multichrome (which they call Ultra Chromes)! And the (H) means that it is also holo, as you can plainly see in the pic on the right. Be still my beating <3!
And finally what really made my heart sing! Beautiful polish gives me the warm fuzzies, but FREE gorgeous polish? Words fail me, so let's make up a new term....hot wollies.
This was what I purchased to reach $72. Zoya Remove + is my all time favorite polish remover. It makes removal easier, conditions my cuticles, AND smells so good. I have been wanting to buy some of the HUGE refill bottles and I also needed a new pump since one of mine died. I added two of the Fall Pixie Dusts, Carter (left) and Chita (right). These will both be featured soon! Now on to the REALLY good stuff. Here is EVERYTHING I got for free!
Half Time Polish Drying Accelerator (regularly $7.50. I haven't tried this yet), mini Color Lock System (Remove +, Anchor Base Coat, Armor Top Coat and Fast Drops, a $22 value) and another 2 oz of Remove + ($4.60 value).
On to the REALLY exciting stuff, the Cheers To All Dream Box! Twelve glorious colors and not a one already in my stash! It is valued at $96! Want a closer look? Just know before you go on that I was so eager to get these pics taken, I couldn't even wait for the condensation to clear from the bottles (everything was practically frozen in the box).
Left to right: Ziv, Timo (in my wishlist), Black Swan and Dream (another wishlist dweller).
Cassedy, Payton (Wishlister), Sarah and Anaka
Dakota, Stacy, Rekha and Noot (another one on my wishlist).
So shall we figure this all out? I spent just under $78. The value of of all the free goodies....over $130! Have you done the math? Over $200 worth of product for a little under $78! That's like getting over 60% off! Plus I have a gorgeous box I can nestle all my favorite Zoyas in. Now if I only had a mani cave so I could display them.
Getting these packages all at once gave me that rare feeling that I used to get on Christmas morning as a child; unabashed joy! Hot woolies all around!
Did you get any good Black Friday deals? Any of them polish related? Tell me all about it....go ahead and brag! Thanks for visiting!
Tina


